Prefilled values
A productivity feature that auto-populates documentation fields with values you set once — Workspace-wide or per Project, on iOS, Android, and the Webclient.
Sparkify's Prefilled values are a productivity feature available across all Sparkify surfaces — iOS, Android, and the Webclient. They're designed to eliminate one of the biggest time-sinks in field documentation: typing the same information twice -or even more times.
Prefilled values apply at two layers — the Workspace layer and the Project layer — and fill out the fields inside every new documentation you create. Sparkify always ships with Default Templates — configured by us to cover the standard VDE inspection flows out of the box — but with the right subscription you can additionally create your own custom Documentation Templates tailored to your team's workflow. Either way, prefilled values plug into whichever templates you're working with. Any field you find yourself entering repeatedly — customer details, default cable cross-sections, standard MCB / RCD characteristics, recurring location notes, characteristic test parameters — can be set once and then auto-populate every documentation made from that template. We mark the prefilled values with the bolt icon.
The two layers
Workspace-level prefills — set once at the workspace layer and they cascade into every project in that workspace. Ideal for information that's true across an entire business: a recurring customer the team services regularly, a workspace's go-to default cable type, the company's standard inspection-interval policy.
Project-level prefills — defined inside a single project and scoped to that project. They also flow into all of its subprojects unless a subproject overrides them. Ideal for the specifics of this building or this job: site address, on-site contact, the actual distribution-board characteristics for this installation.
The two layers compose: project-level prefills naturally take precedence over workspace defaults where they overlap, so the user gets the most specific value automatically without having to fight it.
Why it matters
For an electrician running dozens of VDE 0100-600 / VDE 0701-0702 inspections a month, repetitive data entry isn't just annoying — it's where errors creep in (mistyped customer names on PDF reports, inconsistent cable specs across measurement rows, and so on). Prefilled values shift the work from "type it every time" to "decide it once," which is exactly the same principle that drives our QR-import-from-planning-tools flow (ABB EasyPro, Stromlaufplan.de).
In short: recurring info, handled elegantly — without forcing the user to remember it, retype it, or hunt for it.
How to apply Prefilled values in the mobile apps
From the Workspace layer
Open Manage Prefilled values from your Profile

Open the Profile screen. Under the Workspace section you'll see a tile called Manage Prefilled values. Tap it — a 3-step flow opens with the first step (choose a documentation template) already active.

Pick the fields to prefill

After choosing the template, select the fields within it that you want to populate with prefilled values.
Enter or edit the prefilled values

Enter the values for each field you selected. If prefills already exist, you can edit them in this step too.
Special case for Blocks — if the item you tap is a Block (a group of related fields) rather than a single field, tap it once more to drill into the Block and edit the individual grouped fields. This only applies when fields are grouped under a Block; standalone fields stay editable inline.

From the Project layer
Project-layer prefills are reached from inside the project itself — first navigate to the desired project, then use either of the two entry points below. The inner flow is identical to the Workspace layer (template → fields → data).
Option A — Prefilled values button under the search bar

Tap the Prefilled values button directly under the search bar.
Option B — More options menu (the 3 dots icon) in the app bar

Tap the three-dots / more-options icon next to the Add new project button at the top-right of the app bar. A bottom sheet opens — the Prefilled values button is in there.
Clearing a prefilled value
To clear a value that's already prefilled on a Documentation Template field, swipe left on the field — a Delete action appears, as shown below. Tap it to remove the value.
Entry points for managing Prefilled values on the Webclient
From the Workspace layer
Workspace Settings → General → Prefilled values
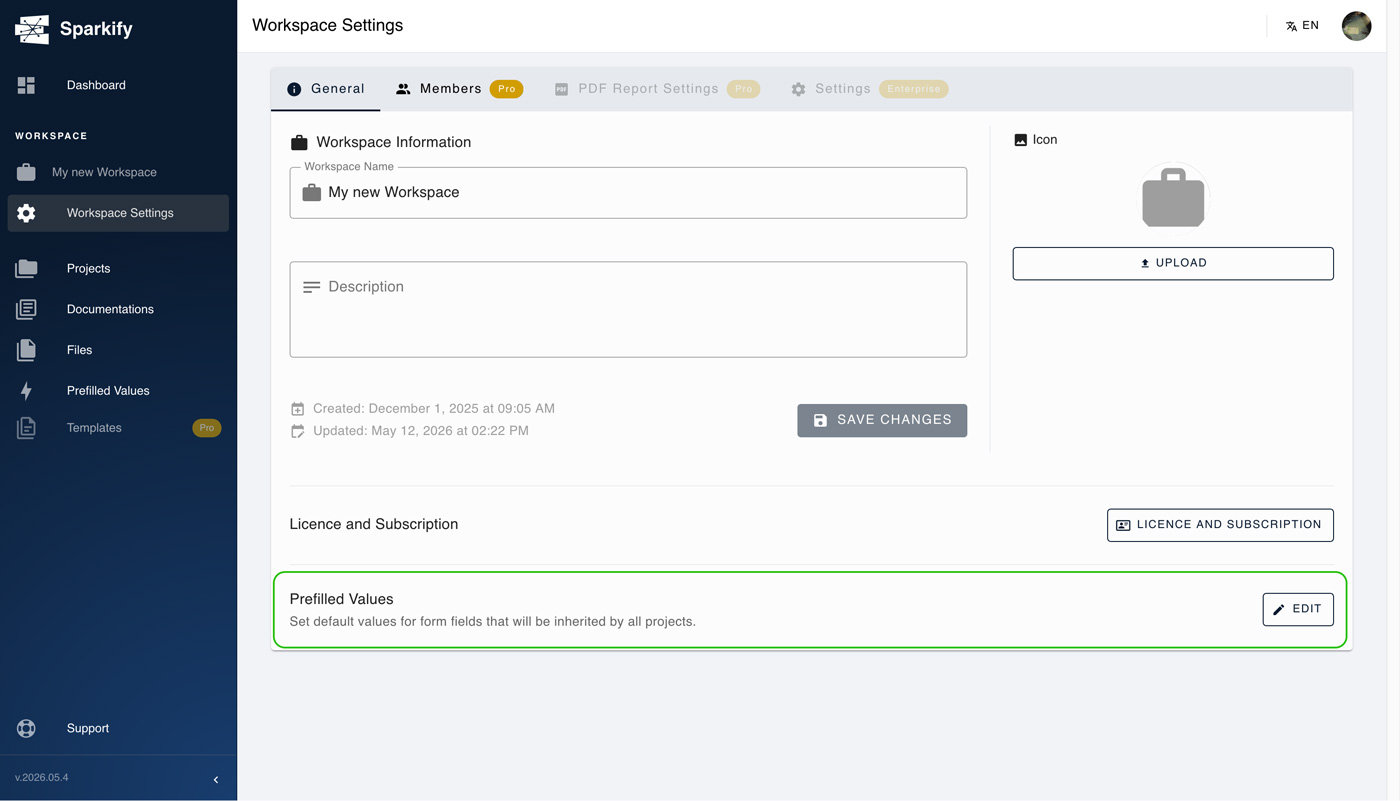
Open Workspace Settings and stay on the first tab — General. At the bottom of that panel you'll see Prefilled values with an aligned Edit button. Press Edit to enter the Workspace-layer Prefilled values flow.
The flow itself mirrors the mobile client — the same 3 steps (template → fields → data).
From the Project layer
Project-layer prefills on the Webclient also have two entry points. First navigate into the desired project, then use either of the buttons below.
Option A — Bolt icon in the top bar
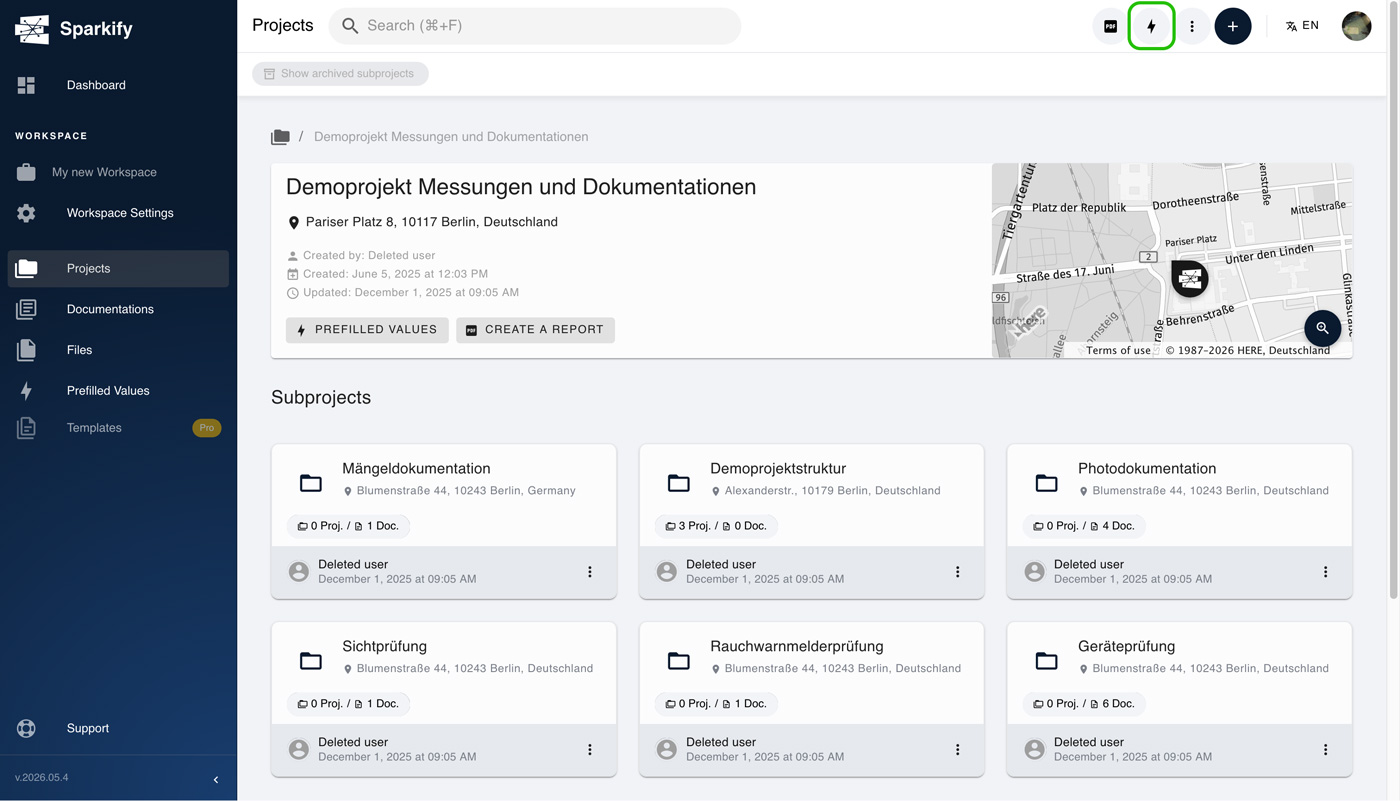
There's a circular button with a bolt icon in the top bar at the top-right of the screen. Click it — a dropdown appears with two options: Edit prefilled values and Apply prefilled values. Pick one and you enter the same 3-step flow you've already seen on the Workspace layer.
Step 1
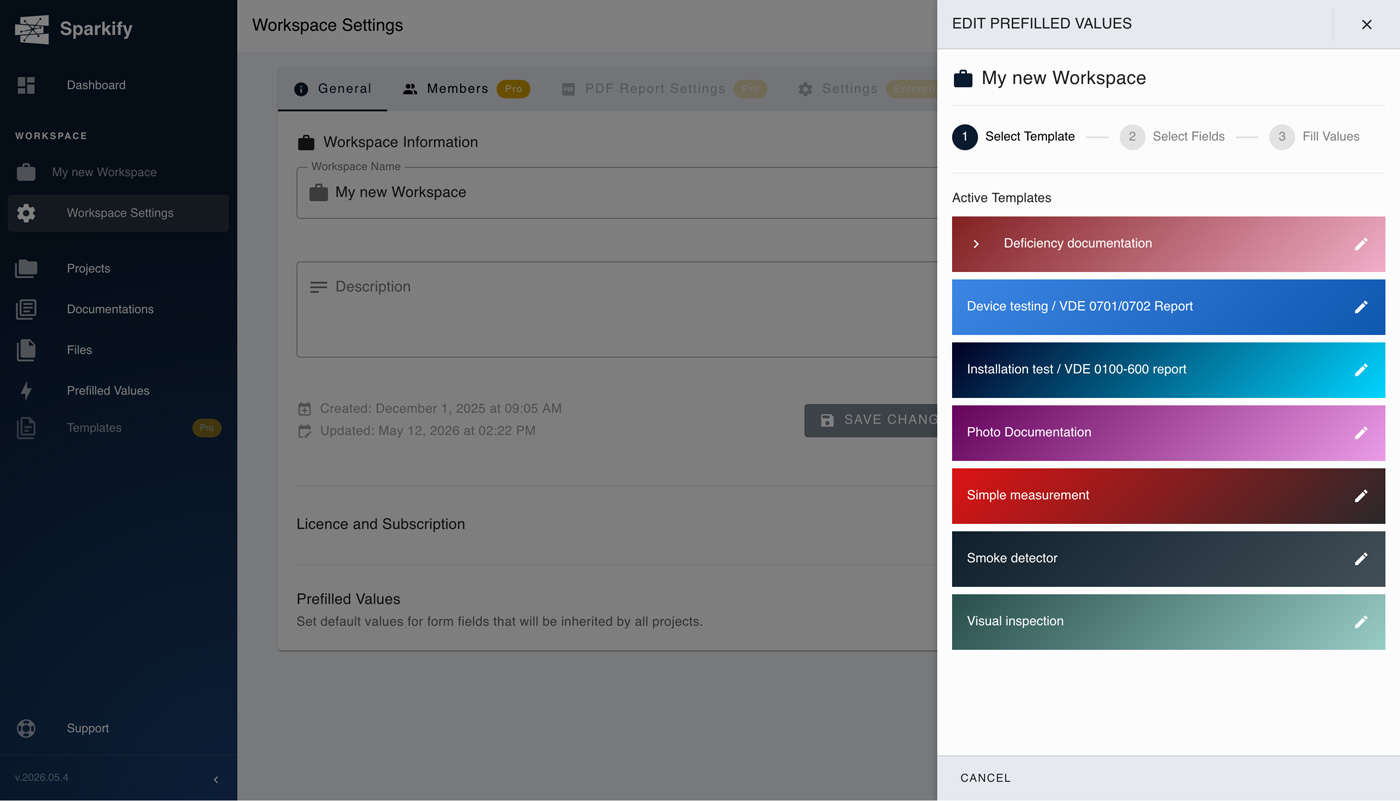
Choose the Documentation template for which you would like to use the Prefilled values.
Step 2
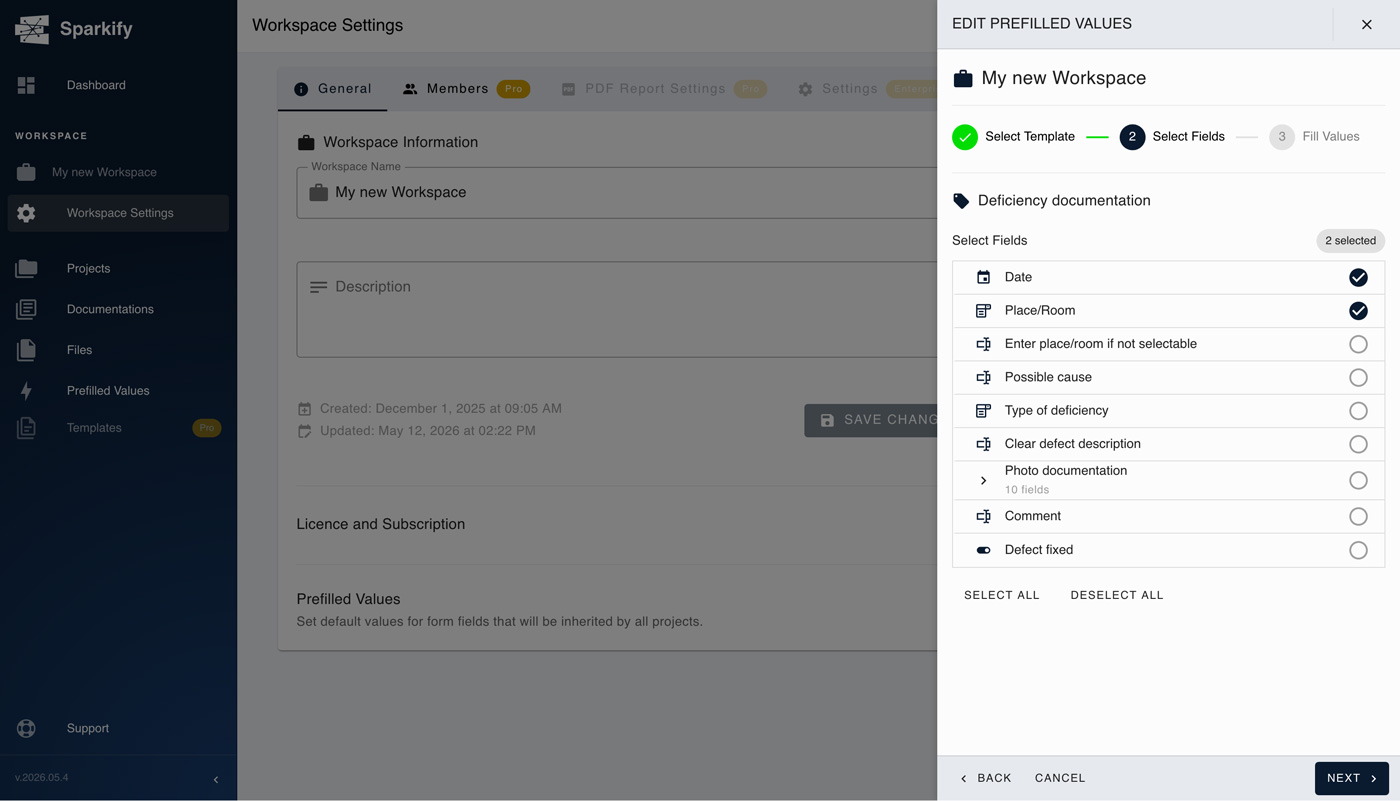
Choose the fields you want to add/edit the values for.
Step 3
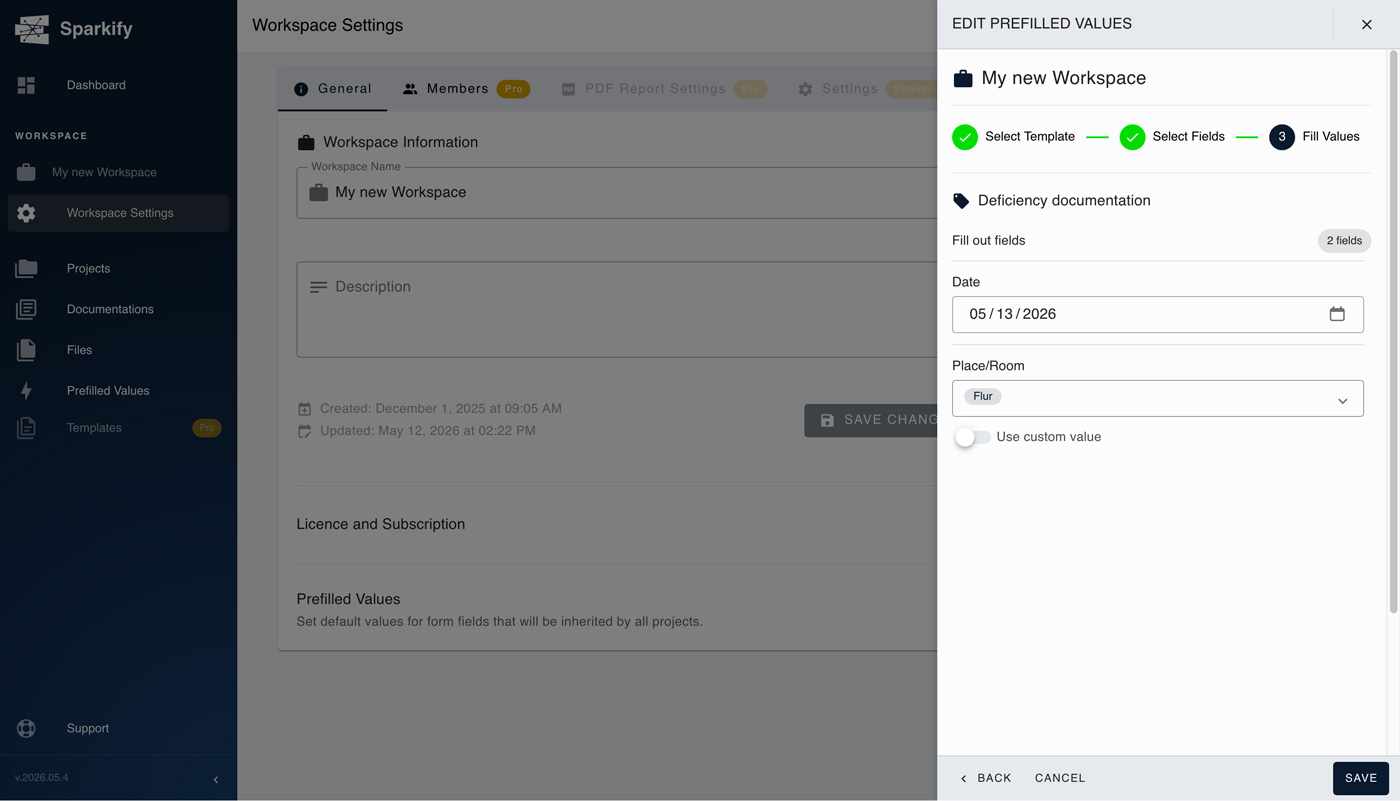
Add/edit the values for the chosen fields.
For when to use Apply, see Apply Prefilled values project-wide on the Webclient. For when to use Edit, see Edit Prefilled values on the Webclient.
Option B — Prefilled values button on the project info card
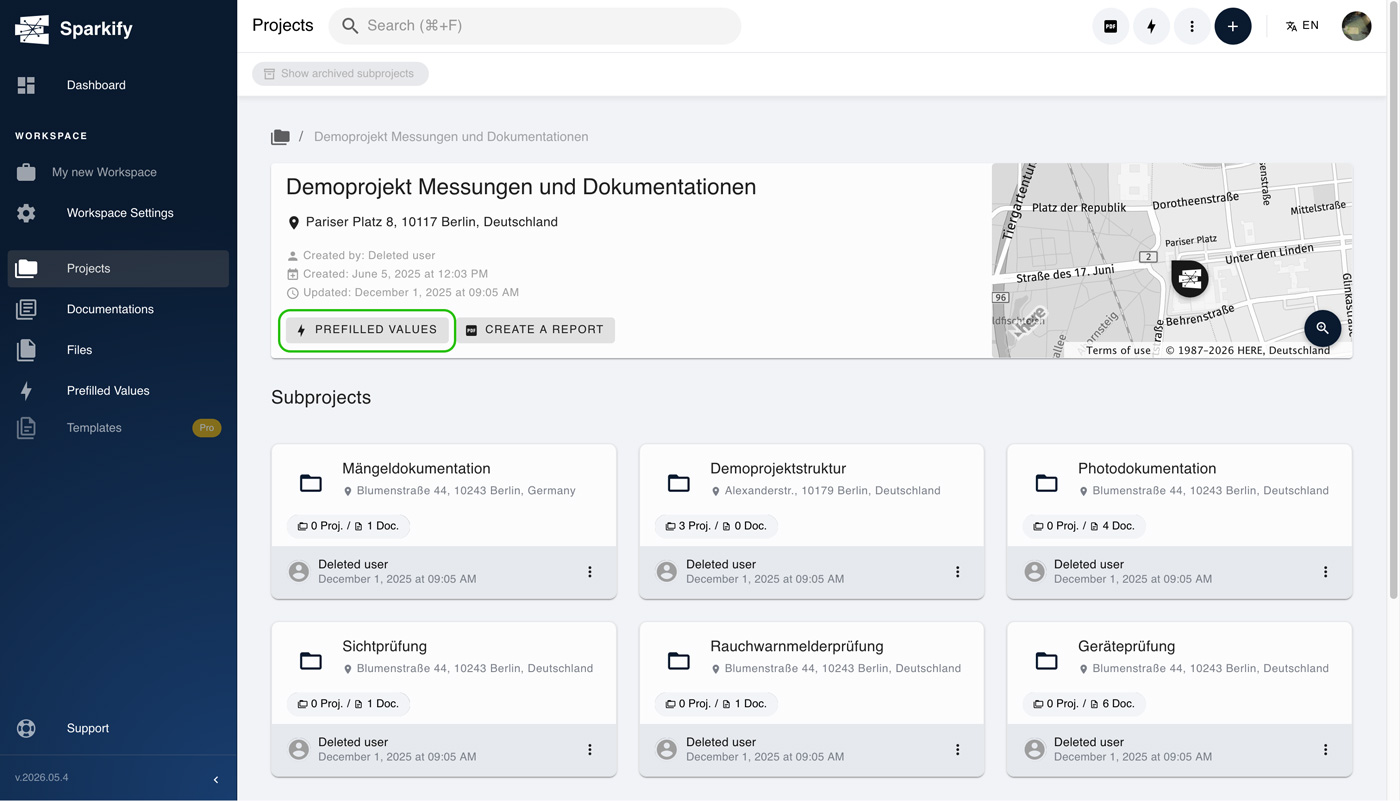
Below the top bar and the breadcrumbs, the main project info card carries the project name, address, and map. Inside that card is a Prefilled values button — pressing it opens the same Edit / Apply dropdown as the bolt-icon route.
Prefilled values overview on the Webclient
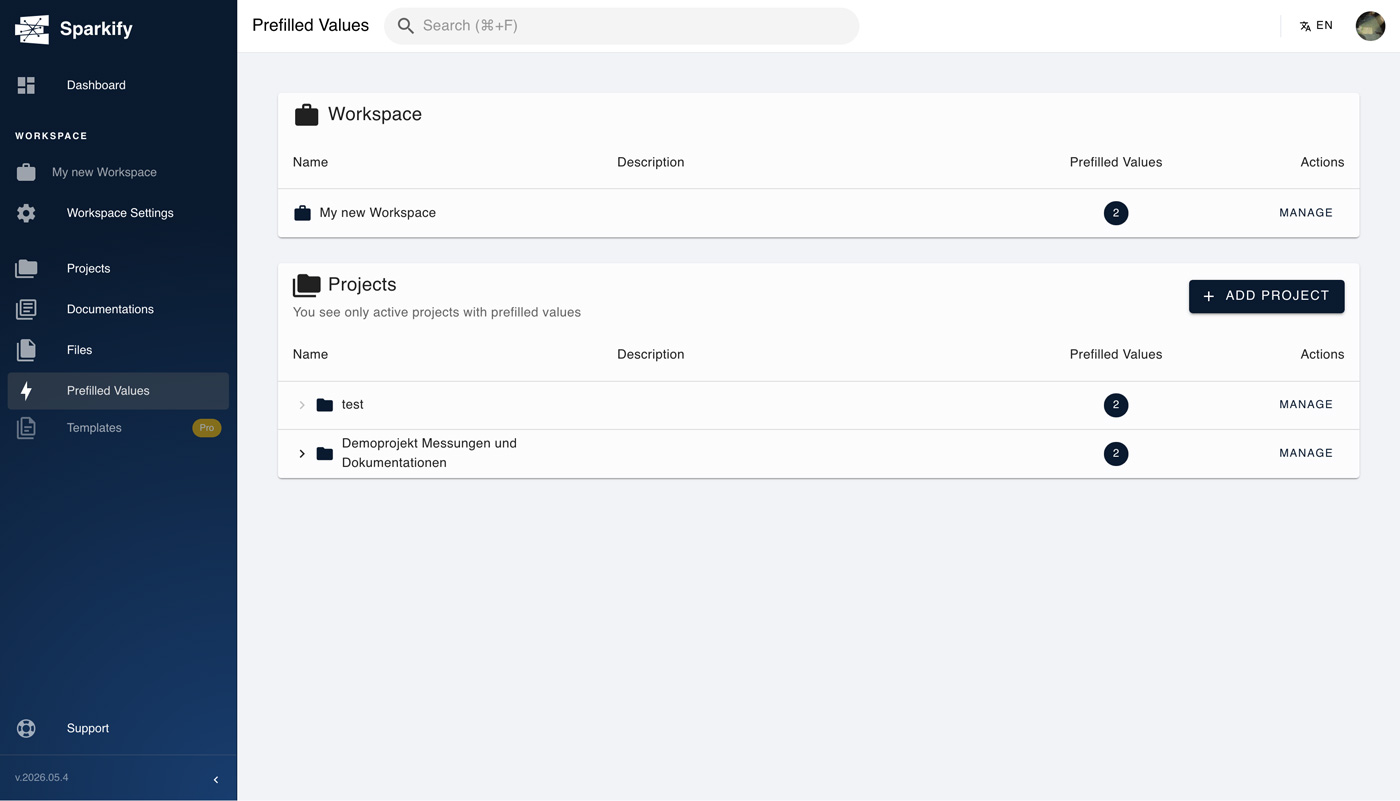
The Webclient has a dedicated overview screen that lists, in one view, every place a Prefilled value is currently set — the Workspace itself and every Project that has prefills applied. It's the fastest way to audit the feature's footprint across your whole workspace without drilling into each project individually, and you can start setting prefilled values for projects from here too.
Where to find it
In the Webclient's left sidebar, find the entry marked with the bolt icon and labelled Prefilled values. Click it to open the overview screen.
What the overview shows
The overview is a single list with two kinds of entries:
- Workspace — one row representing the workspace-level prefilled values.
- Projects — one row per project, identified by the project's name. If the project carries a description, it shows in its own column right next to the name — useful for telling apart projects whose names alone aren't enough.
Every row carries two affordances on the right:
- A badge with a number — the count of prefilled values currently set at that scope. So at a glance you see how many prefills sit on the Workspace and how many sit on each Project.
- A Manage button — routes you straight into the edit flow for that scope. The flow that opens is the same one already covered earlier in this article (Workspace layer or Project layer, depending on the row), so editing from the overview is a shortcut — there's no separate "manage" flow, just a direct entry into the existing one without first navigating into the project.
Searching and adding new projects
The Projects portion of the overview also carries a search box — type a project name to filter the list down to the matching projects. Useful in workspaces with many projects, where scrolling the full list would be slower than typing.
The overview isn't limited to projects that already have prefills. To start applying prefilled values to a project that doesn't have any yet, click the + Add project button at the top-right of the Projects list. A search box appears — type at least three letters of the project name, pick the project from the results beneath the search, and hit Add prefilled values. From there you continue in the same 3-step Edit flow (template → fields → data) already shown for the Project layer. So the overview is both the audit view for existing prefills and the launchpad for rolling them out to new projects, without ever leaving this screen.